
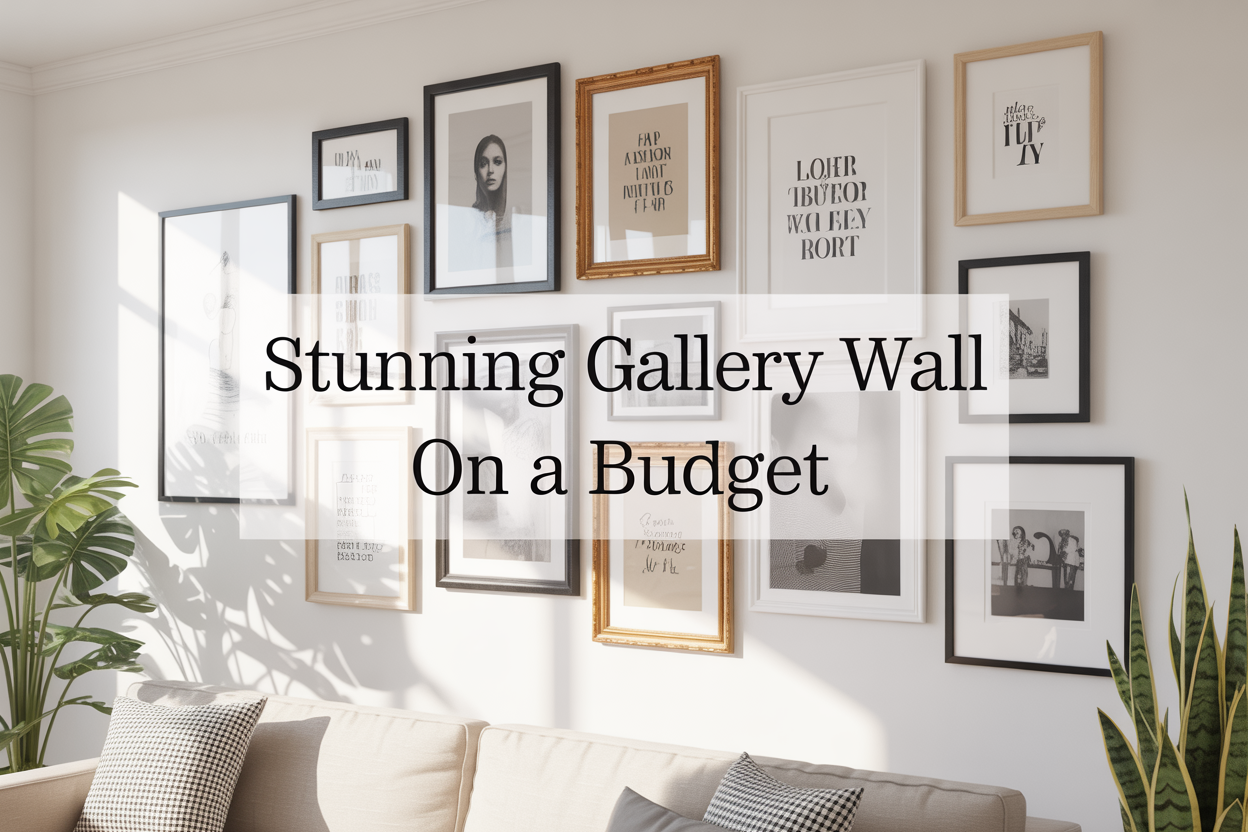
Creating a stunning gallery wall doesn't have to drain your bank account. This guide is perfect for renters, new homeowners, college students, and anyone who wants to transform their walls without breaking the budget.
A gallery wall can instantly elevate any room and showcase your personality. The key is knowing where to find affordable art prints, how to score cheap picture frames, and which layout tricks create maximum visual impact for minimal cost.
We'll walk you through planning your gallery wall layout using free tools and techniques that save you from costly mistakes. You'll also discover creative alternatives to expensive custom framing that still deliver that high-end look. Finally, we'll cover professional installation tips that ensure your budget wall decor looks like it was designed by an interior decorator.
👉 Get Free DIY Tips HerePlan Your Gallery Wall Layout Without Spending a Dime
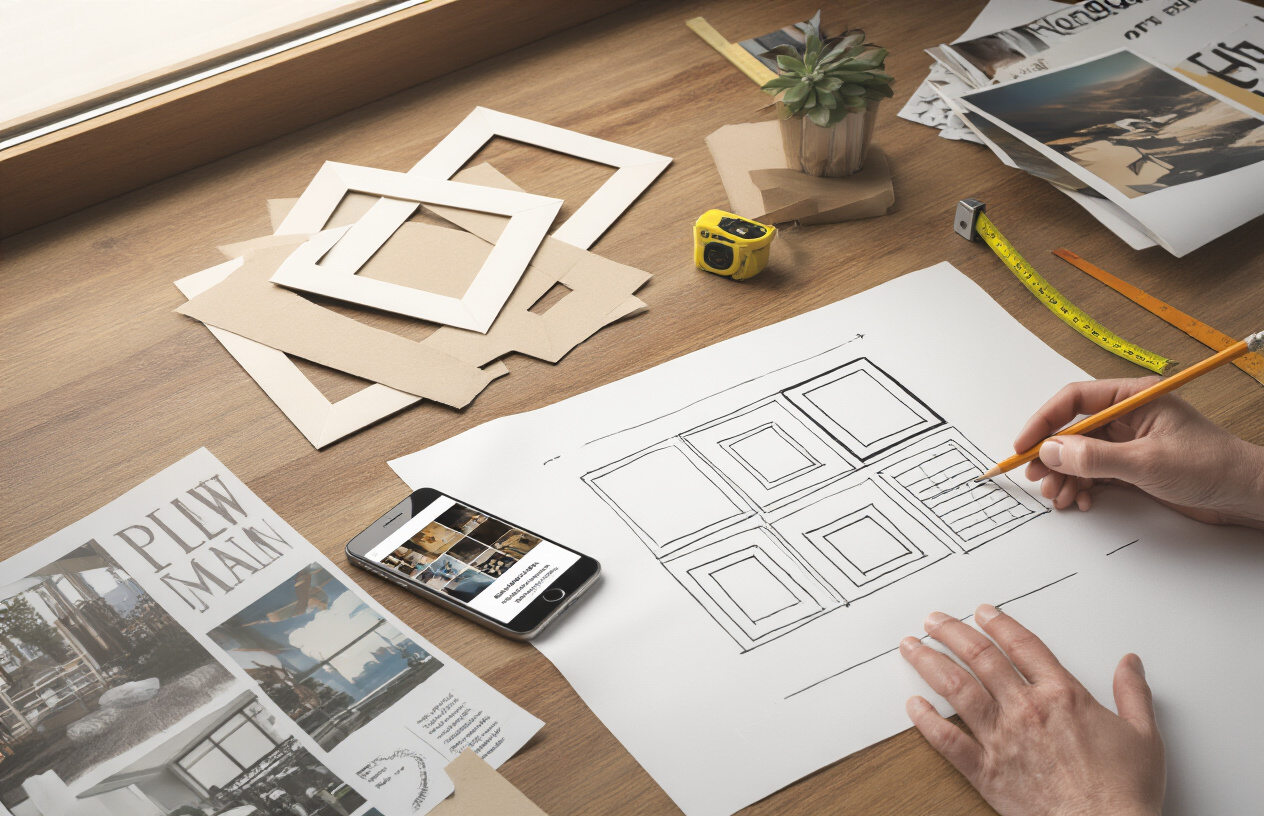
Measure your wall space and create a paper template system
Start by grabbing a measuring tape and getting the exact dimensions of your wall space. Write down the height and width, then cut brown paper bags or newspaper to match these measurements. This simple trick lets you visualize exactly how much space you're working with without making a single mark on your wall.
Create individual paper templates for each piece you plan to hang. Measure your existing artwork, photos, and frames, then cut corresponding paper shapes. Label each template with what it represents - "family photo," "abstract print," or "vintage poster." This budget gallery wall approach saves you from costly mistakes and multiple nail holes.
The paper template system works brilliantly because you can tape these cutouts directly to your wall and rearrange them endlessly. Move pieces around until you find the perfect balance without any commitment. Take photos of different arrangements so you can compare layouts later.
👉 Get Free DIY Tips HereUse free online gallery wall planning tools and apps
Digital planning tools make gallery wall layout planning incredibly easy and completely free. Websites like IKEA's gallery wall planner and apps such as Gallery Wall allow you to input your wall dimensions and experiment with different arrangements on your phone or computer.
These tools often include templates for popular frame sizes and spacing guidelines that professional designers use. Many apps let you upload photos of your actual artwork, so you can see exactly how your pieces will look together before hanging anything.
Pinterest serves as another fantastic free resource for DIY gallery wall on budget inspiration. Create boards to collect layout ideas that match your style and wall size. Search terms like "budget gallery wall" or "affordable wall art ideas" to find layouts that won't break the bank.
Test arrangements with newspaper cutouts before committing
Newspaper cutouts take your planning to the next level by letting you physically test every possible arrangement. Cut newspaper or kraft paper to match each frame size, then tape them to your wall using removable painter's tape that won't damage your paint.
Live with these arrangements for a few days to see how they feel in different lighting conditions. What looks perfect in morning light might feel unbalanced in the evening. This testing phase prevents expensive do-overs and helps you create a cheap gallery wall that looks professionally designed.
Try the "salon style" approach by clustering your newspaper cutouts closely together, or experiment with symmetrical grids for a more modern look. Test asymmetrical arrangements too - sometimes the most interesting gallery walls break traditional rules.
Choose the perfect focal point for maximum visual impact
Every stunning gallery wall needs an anchor piece that draws the eye and holds the composition together. This doesn't mean you need an expensive centerpiece - your focal point could be a large DIY print, a meaningful family photo, or even a colorful piece of children's artwork in an oversized frame.
Position your focal point slightly off-center rather than dead center for a more dynamic look. The rule of thirds works perfectly here - imagine your wall divided into nine equal sections and place your anchor piece where the lines intersect.
Build your remaining pieces around this focal point, keeping similar visual weight on both sides. If your anchor piece is dark and heavy-looking, balance it with smaller dark pieces scattered throughout the arrangement. For budget home decor success, remember that visual weight matters more than actual size or cost.
Source Affordable Art and Prints That Look Expensive
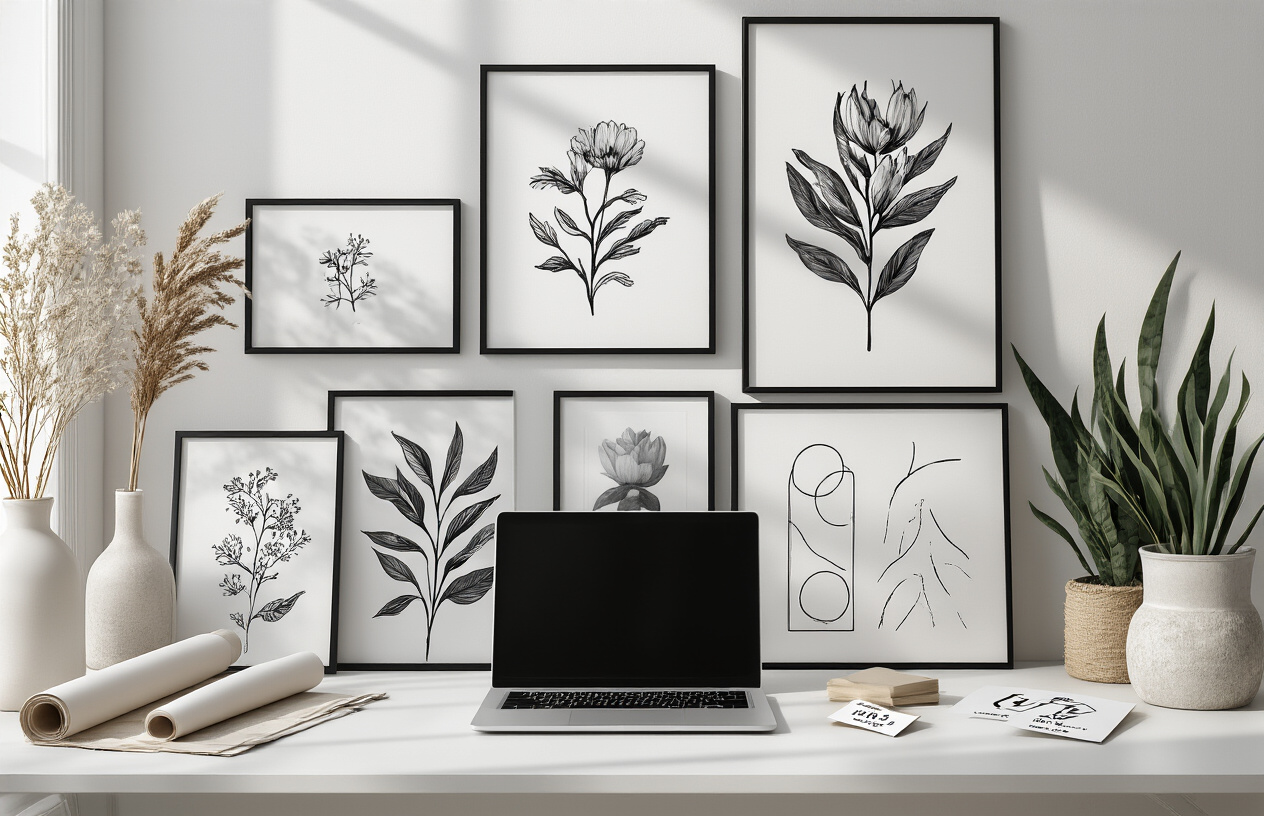
Download High-Quality Free Printables from Design Websites
The internet is packed with gorgeous, professional-quality art that won't cost you a penny. Websites like Unsplash, Pixabay, and Pexels offer stunning photography that you can download and print at home or your local print shop. Many design blogs also share free printable art monthly – just search for "free printables" plus your preferred style like "minimalist" or "botanical."
Pinterest is another goldmine for budget wall art ideas. Search for "free gallery wall printables" and you'll discover collections of coordinated prints that work beautifully together. Many independent artists share their work for free download, especially seasonal pieces and motivational quotes.
| Website Type | Best For | Print Quality |
|---|---|---|
| Photography sites (Unsplash) | Modern, professional looks | High resolution |
| Design blogs | Themed collections | Varies, usually good |
| Artist portfolios | Unique, artistic pieces | Excellent |
Always check the licensing terms before printing. Most free downloads allow personal use, which covers your home gallery wall perfectly.
👉 Get Free DIY Tips HereCreate Your Own Artwork Using Basic Materials and Techniques
Making your own affordable art prints is easier than you think. Watercolor paper and a basic set of paints can produce gallery-worthy abstract pieces. Even if you're not artistically inclined, simple techniques like color blocking, geometric shapes, or paint pouring create stunning results.
Try creating a series using the same color palette but different compositions. Three to five pieces in coordinating colors instantly look professional and intentional. Acrylic paints work well for beginners and dry quickly, while watercolors create beautiful, soft effects perfect for bedrooms or living spaces.
Digital art is another budget-friendly option. Free apps like Canva or even basic computer programs let you create typography art, simple graphics, or photo collages. Print these on quality paper and they'll look like expensive designer pieces.
Photography from your phone can also become beautiful wall art. Black and white photos of everyday objects, nature shots from walks, or architectural details around your neighborhood make for compelling gallery wall pieces when printed large.
Shop Thrift Stores and Garage Sales for Hidden Gems
Thrift stores are treasure troves for cheap gallery wall finds. Look beyond the obvious artwork – old books, vintage postcards, and even decorative paper can become stunning wall pieces when framed properly. Estate sales often have better quality pieces at reasonable prices.
The key is seeing potential rather than perfection. A beautiful frame with outdated art can be refreshed with new prints. Vintage maps, botanical illustrations from old encyclopedias, and even sheet music create interesting gallery wall elements with character and history.
Don't overlook damaged pieces either. A painting with a small tear might be perfect if you're planning to cut it down or use only a portion. Sometimes the most interesting gallery walls mix pristine pieces with weathered, vintage finds that tell a story.
Build relationships with thrift store employees – they often know when new donations arrive and can give you a heads up about interesting pieces coming in.
Transform Magazine Pages and Book Illustrations into Wall Art
High-end magazines contain incredible photography and illustrations that cost nothing beyond the magazine price. Fashion magazines have stunning editorial shots, while home and garden publications feature beautiful lifestyle photography perfect for gallery walls.
Vintage books, especially those headed for the donation pile, often contain gorgeous illustrations. Botanical guides, art books, and even children's books from decades past have illustrations that look intentionally curated when framed and grouped together.
Atlas pages make particularly striking gallery wall elements, especially when you choose maps of places that mean something to you. Old calendars also provide 12 months worth of beautiful imagery for the price of one calendar at year's end.
The trick is selecting pages that work together – either through color scheme, subject matter, or style. Pages with similar color palettes create cohesion even when the subjects vary. Always use acid-free matting to preserve magazine pages, as the paper quality varies and some may yellow over time.
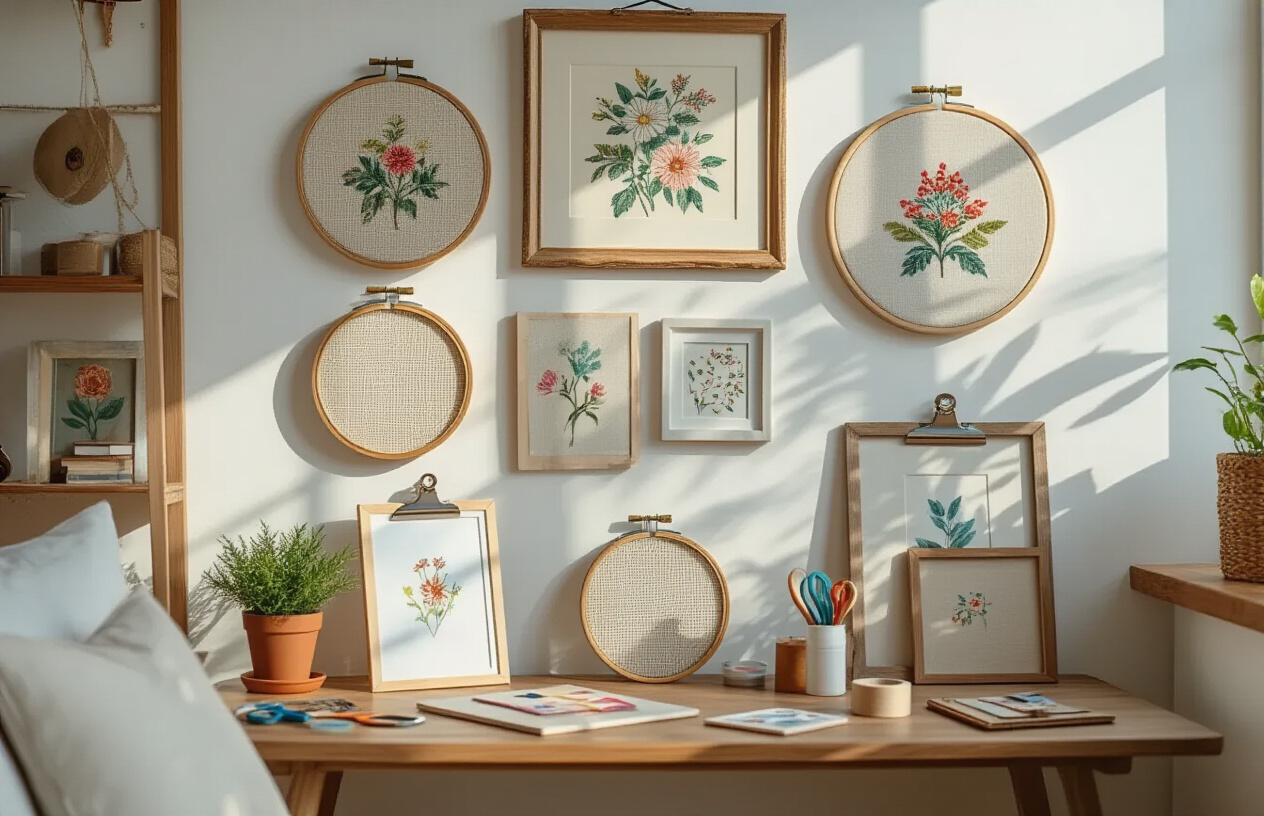
Frame Your Art for Less Using Creative Alternatives
Repurpose existing frames with spray paint and new matting
Your old frames don't have to stay boring just because they've been sitting around for years. A quick makeover can transform those outdated frames into stylish pieces that look like they came from an expensive boutique. Start by giving your frames a thorough cleaning with a damp cloth to remove dust and grime.
Spray paint works magic on any frame material - wood, plastic, or metal. Choose colors that complement your room's palette. Matte black creates a sophisticated gallery look, while bright white gives a clean, modern feel. Metallic finishes like gold or copper add luxury without the price tag. Always use primer first on glossy surfaces to help the paint stick better.
New matting instantly upgrades your cheap picture frames and creates a professional appearance. White and cream mats work with almost any artwork, while colored mats can make your prints pop. Cut your own mats using a craft knife and ruler, or buy pre-cut mats from craft stores during sales. Double matting (using two layers of different colored mats) creates depth and looks incredibly expensive.
Before spray painting, remove glass and backing from frames. Work in a well-ventilated area and apply thin, even coats. Let each layer dry completely before adding the next. This budget-friendly approach can save you hundreds compared to buying new frames for your DIY gallery wall on budget.
Make DIY frames using inexpensive materials from hardware stores
Hardware stores are goldmines for affordable home decorating materials that can create stunning frames. Wood trim pieces, available for under $5 per length, make excellent frame components. Choose from simple flat strips for modern looks or decorative molding for traditional styles.
Basic tools needed for this project include a miter saw (or miter box), wood glue, small finishing nails, and sandpaper. Many hardware stores will cut your wood to size for free or a small fee if you don't have the right tools at home. Measure your artwork first, then add the desired border width to determine your cutting measurements.
Here's a simple process for creating custom frames:
- Cut four pieces at 45-degree angles for corners
- Sand all pieces smooth
- Apply wood glue to corners and clamp together
- Secure with small finishing nails once dry
- Sand any rough spots and apply stain or paint
Plexiglass costs much less than regular glass and won't shatter if dropped. Many hardware stores cut plexiglass to size on the spot. For backing, use thin plywood, cardboard, or foam board depending on your artwork's weight.
Metal strips and L-brackets create industrial-style frames perfect for modern cheap gallery wall designs. Combine different materials like wood and metal for unique, designer-looking frames that nobody will guess came from the hardware store.
Mix and match thrift store frames for an eclectic designer look
Thrift stores hide frame treasures that just need some love to become gallery-worthy pieces. Don't worry about finding matching sets - the magic happens when you combine different styles, sizes, and finishes into one cohesive display. This approach gives your budget gallery wall character and personality that perfectly matched frames simply can't achieve.
Look for frames with interesting details like carved corners, unusual shapes, or vintage hardware. Frames missing glass or backing are often heavily discounted since most people skip them, but these components are easy to replace cheaply. Focus on frames with good bones - solid construction and appealing shapes matter more than surface condition.
Create visual connection between mismatched frames by painting some in the same color while leaving others in their original finish. This technique pulls the collection together without making everything identical. Try painting every third frame the same color, or paint all wooden frames one shade while leaving metal frames untouched.
Size variation adds visual interest to your affordable wall art ideas. Mix large statement pieces with smaller prints, varying the heights and widths across your wall. Arrange frames on the floor first to experiment with different combinations before committing to nail holes.
Group frames by color families rather than exact matches. Warm metallics like gold, brass, and copper work beautifully together, as do cool tones like silver, pewter, and brushed nickel. This budget wall decor strategy creates sophisticated arrangements that look intentionally curated rather than accidentally collected.
Install Your Gallery Wall Like a Professional
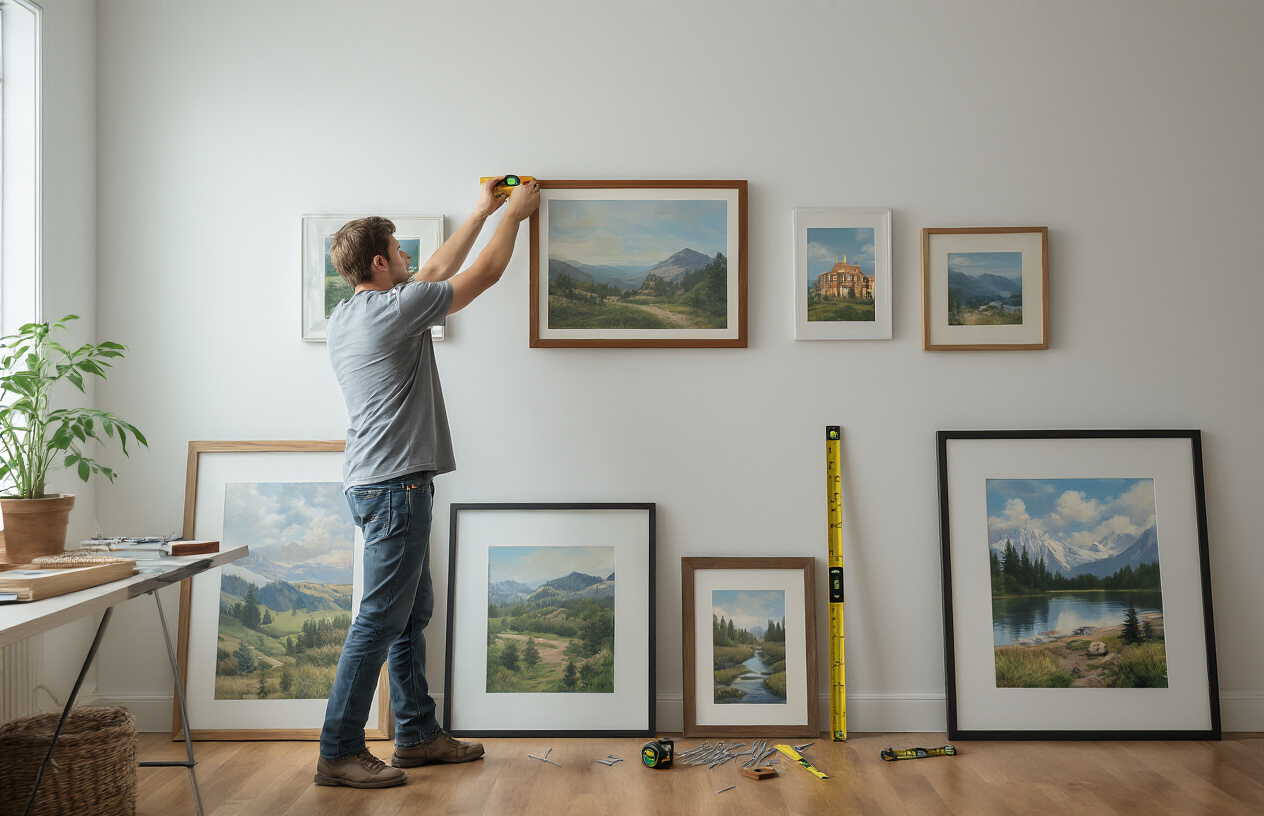
Use the Right Hanging Hardware for Your Wall Type
Different walls require different hanging approaches to keep your budget gallery wall secure and damage-free. For drywall, standard picture hanging hooks work perfectly for lightweight frames under 10 pounds. Picture ledge strips offer an affordable alternative that lets you easily rearrange your display without creating new holes. For heavier pieces, locate wall studs using a simple stud finder and use wood screws with picture wire.
Brick or concrete walls need masonry anchors or adhesive hooks specifically designed for these surfaces. Command strips work wonderfully for renters who can't put holes in walls – just make sure to check weight limits. Always test your hardware with one frame before committing to your entire arrangement.
Create Perfect Spacing with Simple Measuring Tricks
Professional-looking spacing doesn't require expensive tools. Cut paper templates matching each frame's dimensions and tape them to the wall first. This lets you experiment with layouts without making holes. For consistent spacing between frames, use a ruler or even a book as your measuring guide – most designers recommend 2-3 inches between pieces.
The "57-inch rule" places artwork centers at 57 inches from the floor, which works for most ceiling heights. For groupings, measure from the center of the entire arrangement rather than individual pieces. Mark lightly with pencil before hanging, and step back frequently to check your progress.
👉 Get Free DIY Tips HereHang Artwork at Optimal Height for Visual Appeal
Eye-level placement creates the most comfortable viewing experience, but this varies depending on your room's function. In dining rooms, hang art slightly lower since people will be seated. For hallways, consider the height of people walking through the space.
When creating your DIY gallery wall on budget, remember that the bottom of frames should typically sit 8-10 inches above furniture like sofas or console tables. For standalone walls, the center point of your arrangement should hit that 57-inch sweet spot. If you're mixing different sized frames, align them by their center points rather than tops or bottoms for a cohesive look.
Balance Colors and Sizes Throughout Your Arrangement
Creating visual balance prevents your budget wall decor from looking chaotic or lopsided. Distribute your largest pieces first, spacing them evenly across the wall rather than clustering them together. Think of your arrangement as having visual weight – darker pieces and larger frames carry more weight than lighter, smaller ones.
Mix frame sizes in odd numbers when possible, as this creates more natural-looking compositions. If you have several pieces with similar colors, spread them throughout your arrangement rather than grouping them together. This technique helps your affordable wall art ideas look intentionally curated rather than randomly placed.
Black and white pieces work as visual anchors, while colorful artwork adds personality. Balance busy patterns with simpler pieces, and vary your frame styles to add interest without overwhelming the space.
Add Finishing Touches That Tie the Whole Wall Together
Small details elevate your cheap gallery wall from good to professional. Add a few three-dimensional elements like small shelves with plants or decorative objects to break up the flat plane of frames. Battery-operated picture lights can highlight favorite pieces without expensive electrical work.
Consider the wall color as part of your design – sometimes painting an accent wall creates dramatic backdrop that makes budget art prints look more expensive. If painting isn't an option, removable wallpaper behind your gallery wall adds instant sophistication.
Finally, include some unexpected elements like mirrors, floating shelves, or even decorative letters mixed among your artwork. These additions create depth and visual interest while staying true to your gallery wall ideas budget. Remember to step back and assess your arrangement regularly, making small adjustments until everything feels perfectly balanced and intentional.
Conclusion

Creating a beautiful gallery wall doesn't have to drain your bank account or require professional skills. By planning your layout first, hunting for budget-friendly art pieces, getting creative with framing options, and taking your time with installation, you can transform any blank wall into a stunning focal point. The secret lies in being resourceful and patient – mixing prints, photos, and alternative art sources while using everyday items as frames can produce results that rival expensive designer displays.
Start gathering inspiration and measuring your wall space today. Your perfect gallery wall is just a few smart shopping trips and creative solutions away. Remember, the best gallery walls tell your personal story, and that story becomes even more meaningful when you've crafted it yourself without breaking the budget.
👉 Get Free DIY Tips Here.jpg)


0 Comments